How to Grill the Best Burger at Home: A Step-by-Step Guide
There’s something almost magical about a burger hot off the grill – that smoky char, the juices running down your wrist, the first bite you’ve been thinking about all afternoon. But if you’ve ever ended up with a dry hockey puck or a patty that fell apart on the grates, you know it doesn’t always go to plan. The good news? Learning how to grill the best burger at home is far easier than you’d think once you understand a few fundamentals.
In this guide, we’ll walk you through everything step by step – from picking the right beef to getting that perfect sear – so your next cookout produces burgers worth bragging about.
How to Grill the Best Burger at Home: The Short Answer
To grill the best burger at home, start with 80/20 ground beef, form gentle patties with a dimple in the center, season generously with salt and pepper, and grill over high, direct heat. Flip only once, cook to a safe internal temperature of 160°F, add cheese near the end, toast the buns, and let the patties rest a few minutes before serving. That’s the whole formula – everything below is the how and why.
What You’ll Need Before You Start
Great burgers begin long before the grill gets hot. Get these pieces right and you’re most of the way there.
Choosing the Right Beef
The single most important decision is the beef itself. You want ground chuck with a fat content of about 80% lean to 20% fat. Fat is what keeps a burger juicy and flavorful, and on the grill a lot of it melts away, so going too lean is a recipe for a dry, crumbly patty. According to the University of Illinois Extension, most grilling experts recommend a high-grade chuck around that 80/20 ratio, though you can go slightly leaner and still stay juicy if you’re careful not to overcook it. You can read more about their recommendation in this <a href=”https://extension.illinois.edu/blogs/simply-nutritious-quick-and-delicious/2025-07-25-making-better-burger”>guide to making a better burger</a>.
When you can, buy freshly ground beef from a butcher or a store that grinds in-house, and skip the pre-formed frozen patties – the quality is almost always better when the meat is fresh.
The Tools That Make a Difference
You don’t need much, but two things matter. First, a reliable grill – gas or charcoal both work great, as long as it gets properly hot. Second, and this is the one people skip: a digital instant-read thermometer. It’s the only truly accurate way to know when your burger is done, and it takes the guesswork out of every cookout. A grill brush, a sturdy spatula, and a little oil round out the kit.
Step-by-Step: How to Grill the Best Burger at Home
Here’s the whole process, start to finish.
Step 1: Form the Patties Gently
Divide your beef into equal portions – about 5 to 6 ounces each makes a satisfying burger. Handle the meat as little as possible. Overworking it packs the proteins tight and gives you a tough, dense patty instead of a tender one. Shape each portion into a disk a little wider than your bun (it’ll shrink as it cooks) and about ¾ to 1 inch thick.
Step 2: Add the Dimple and Season
Press a shallow dimple into the center of each patty with your thumb. As meat heats it contracts and puffs up in the middle, so that little divot keeps your burger flat instead of turning into a meatball. America’s Test Kitchen recommends this exact trick, along with a light hand when shaping – you can see their full rundown in their <a href=”https://www.americastestkitchen.com/articles/3451-how-to-grill-burgers-top-10-tips”>top tips for grilling burgers</a>. Then season generously on both sides with kosher salt and freshly cracked pepper right before grilling. Don’t be shy; most under-seasoned burgers just needed more salt.
Step 3: Get the Grill Hot and Clean
Preheat the grill with the lid down for a good 10 to 15 minutes so the grates are screaming hot. Scrub them clean with a grill brush, then wipe them with an oiled paper towel held in tongs. A hot, clean, lightly oiled grate is what gives you those beautiful sear marks and keeps the patties from sticking and tearing.
Step 4: Grill Over Direct Heat and Flip Once
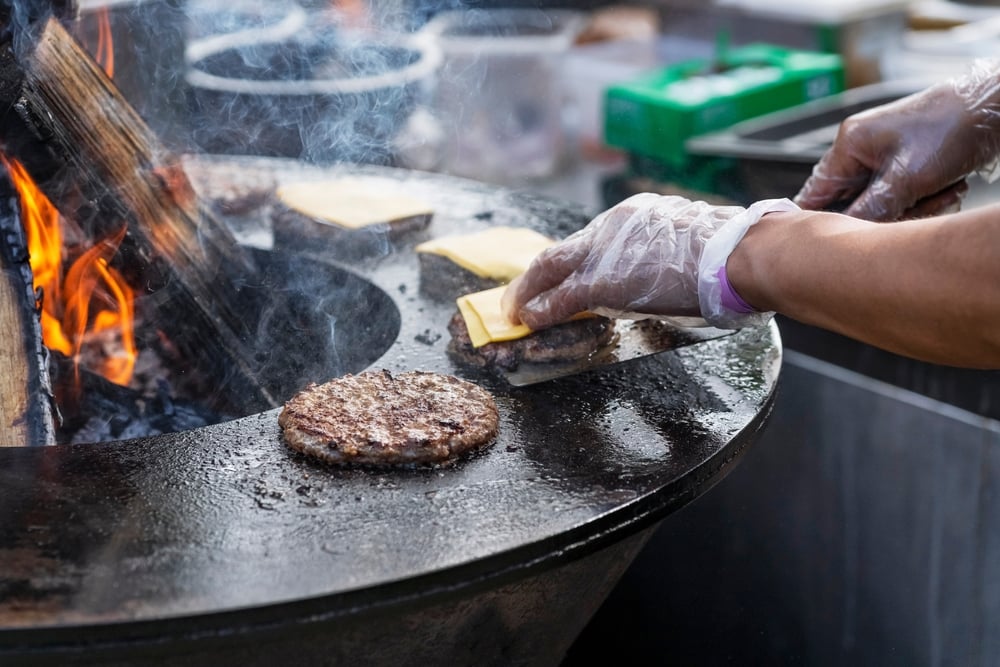
Lay the patties over direct high heat and then – this is the hard part – leave them alone. Resist the urge to press down with your spatula (that just squeezes out the juices) and don’t flip repeatedly. Let a browned crust form on the bottom, usually about 3 to 4 minutes depending on thickness, then flip just once and cook the other side. A single flip lets each side develop that deep, savory sear.
Step 5: Melt the Cheese and Toast the Buns
If you’re making cheeseburgers, lay the cheese on during the last minute or so of cooking and close the lid to help it melt into gooey perfection. Meanwhile, split your buns and place them cut-side down on the grill for just 10 to 15 seconds until lightly golden. Toasting adds texture and, just as importantly, creates a moisture barrier so the bun doesn’t go soggy.
Step 6: Let Them Rest
Pull the burgers off and let them rest for a few minutes before serving. Just like a steak, resting lets the juices redistribute through the patty instead of spilling out the moment you bite in. It’s a small step that makes a real difference in juiciness.
Getting the Temperature Right (Safety and Doneness)
Here’s where a lot of home cooks get nervous, and for good reason. Ground beef is different from a steak: because grinding mixes any surface bacteria throughout the meat, burgers need to be cooked more thoroughly.
Michigan State University Extension advises cooking ground beef to an internal temperature of 160°F, measured with a food thermometer, to make it safe. Just as importantly, they point out that <a href=”https://www.canr.msu.edu/news/become-a-grillmaster-by-using-a-food-thermometer”>color is not a reliable indicator of doneness</a> in ground meat – a patty can turn brown before it’s actually safe, and it can stay a little pink even after it’s fully cooked. That’s exactly why the thermometer matters. Insert it through the side of the patty to the center for the most accurate reading.
The reassuring part: a burger cooked to 160°F can still be wonderfully juicy, especially if you started with an 80/20 blend and let it rest. Safe and delicious aren’t at odds – you just need to cook to temperature, not to color.
Common Burger-Grilling Mistakes to Avoid
Even seasoned grillers fall into these traps. A few to watch for:
Overworking the meat is the most common one – the more you knead and pack it, the tougher your burger gets. Pressing the patties with a spatula while they cook is another; all that satisfying sizzle is your juices escaping onto the coals. Using beef that’s too lean leaves you with a dry result no toppings can fix. Grilling on a cold or dirty grate causes sticking and tearing. And skipping the thermometer means you’re guessing at both safety and doneness. Avoid those five and you’re already grilling better than most.
Two more subtle mistakes are worth mentioning. The first is salting too early: seasoning ground beef and then letting it sit can draw out moisture and change the texture, which is why it’s best to salt the outside of the patties right before they hit the grill. The second is overcrowding – cramming too many patties on at once drops the grill’s temperature and traps steam, so instead of a crisp sear you get a pale, steamed exterior. Give each burger a little breathing room and your crust will thank you.
Build It Right: Toppings and Buns
A great patty deserves a great supporting cast. Keep the bun soft but sturdy – brioche and potato rolls are popular because they’re rich enough to complement the beef without falling apart. On the toppings front, balance beats bulk: something crisp like lettuce, something acidic like pickles or onion to cut the richness, a slice of cheese that actually melts, and a sauce to tie it together. You don’t need a mile-high stack; you need each element to earn its place. Craving inspiration for combinations that work? Browse the specialty builds on <a href=”https://burgerrepublic.com/menu/”>our menu</a> for ideas you can recreate at home.
When You’d Rather Leave It to the Pros
Grilling at home is genuinely fun, and now you’ve got the whole method. But let’s be honest – some nights you don’t want to fire up the grill, scrub the grates, and do the dishes. That’s exactly what we’re here for.
At Burger Republic, we grill our USA Angus beef – a blend of brisket, short loin, and chuck – to order every single day, so you get that just-off-the-grill experience without lifting a spatula. Swing by a location like our <a href=”https://burgerrepublic.com/mt-juliet/”>Mt. Juliet spot</a>, take a peek at <a href=”https://burgerrepublic.com/gallery/”>our photo gallery</a> if you need convincing, and consider joining <a href=”https://burgerrepublic.com/rewards/”>our rewards program</a> to earn a little something back on every visit. Home cook or not, everyone deserves a great burger.
Frequently Asked Questions
What is the best ground beef ratio for grilling burgers? For most grilled burgers, an 80/20 blend – 80% lean beef to 20% fat – is the widely recommended sweet spot. The fat keeps the patty moist and carries flavor, and since much of it renders off on the grill, that ratio leaves you with a juicy, tender result. Leaner blends like 90/10 can work if you’re careful not to overcook them, but they’re far less forgiving. Ground chuck is a popular choice because it naturally lands close to that ideal fat content.
How long should I grill burgers on each side? Over high, direct heat, most patties around ¾ to 1 inch thick take roughly 3 to 4 minutes per side, though thickness and your grill’s heat will change that. Rather than watching the clock, watch for a deep browned crust before you flip – and flip only once. The most reliable approach is to use an instant-read thermometer and pull the burgers when the center reaches your target temperature, since timing alone can’t account for every grill and every patty.
Why do my burgers fall apart on the grill? Usually it comes down to one of three things: the meat was too lean, the patties were handled too gently to hold together (or too roughly and turned crumbly), or the grill grates weren’t hot and oiled before the patties went on. Starting with an 80/20 blend, forming cohesive patties with a light touch, and preheating clean, oiled grates all help. Flipping too early, before a crust has formed, is another common culprit that causes tearing.
Do I really need a meat thermometer for burgers? Yes, and here’s why: research shows that color alone isn’t a dependable sign that a burger is fully cooked. A patty can look done on the outside while the inside hasn’t reached a safe temperature, and some burgers stay slightly pink even when they’re perfectly safe. A digital instant-read thermometer removes all that guesswork, helping you hit 160°F for safety while avoiding the overcooking that dries burgers out. It’s an inexpensive tool that instantly makes you a better, safer griller.
Final Thoughts on How to Grill the Best Burger at Home
Grilling a truly great burger isn’t about secret techniques or fancy equipment. It comes down to quality 80/20 beef, a gentle hand when forming patties, a hot clean grill, a single confident flip, and cooking to the right temperature instead of guessing by color. Add a toasted bun and a thoughtful build, and you’ve got a burger that can go toe-to-toe with your favorite restaurant’s.
So grab some good beef, fire up the grill, and put these steps to work this weekend. And on the nights you’d rather kick back and let someone else handle it, check out our menu and come see us – we’ll have the grill going and a seat waiting for you.